Complete HyperSpin Installation (Covers, Themes and Videos)
How-ToIn this tutorial, we're going to see how to install HyperSpin from scratch and configure it to display videos from the games while browsing the collection of ROMs.
Note: This tutorial does not cover the configuration of emulators and their ROMs. If you want to see how to configure an emulator in HyperSpin, you can see the tutorial about how to configure the PlayStation 2 emulator (PCSX2)
Let's cover the following points:
- Downloading and installing HyperSpin
- Downloading and configuring multimedia files (images and videos)
HyperSpin is used to browse the collection of ROMs from many different platforms within the same interface. In this way, we can have several systems emulated and by accessing from HyperSpin we can see all the games available and launch them.
The configuration of HyperSpin is complex and requires many steps to get the system well configured.
In spite of its complexity, it is worthwhile to completely configure HyperSpin, since we will be able to browse our game collection and watch a video of the game and/or see a wallpaper (Theme) inspired by the game. Here you have a video where you can see the final result of the HyperSpin configuration.
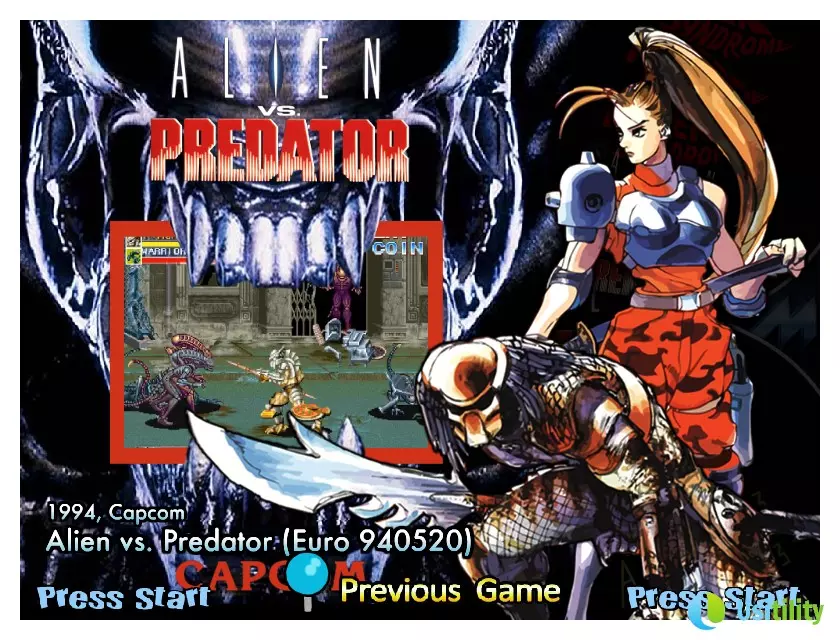
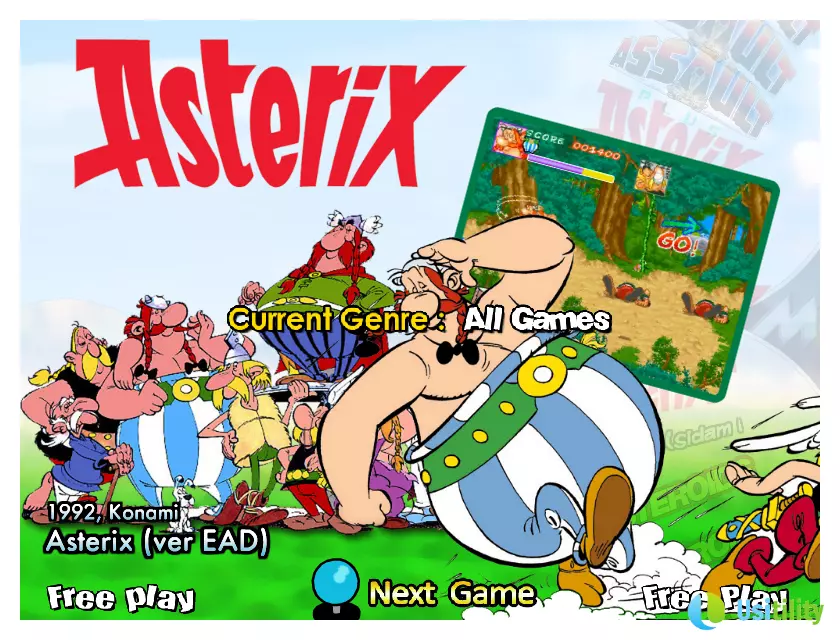
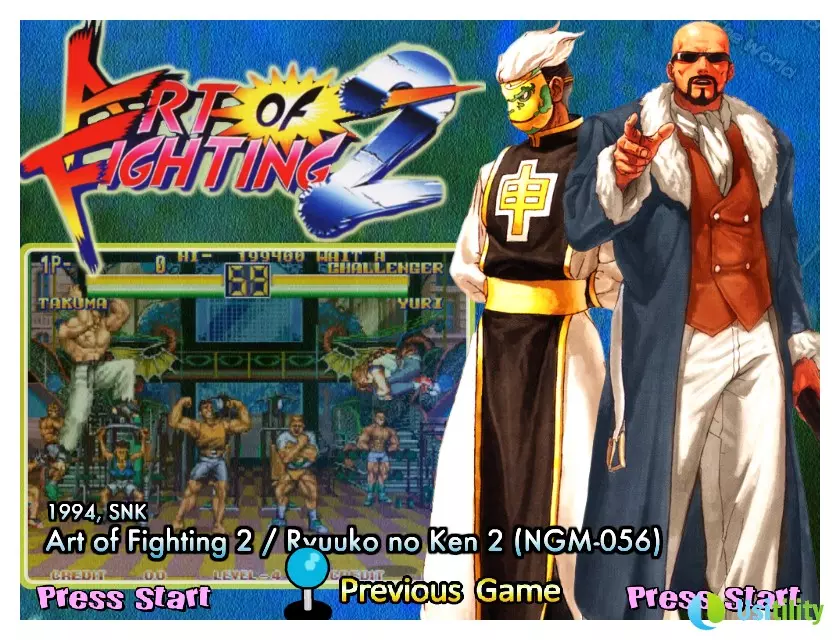
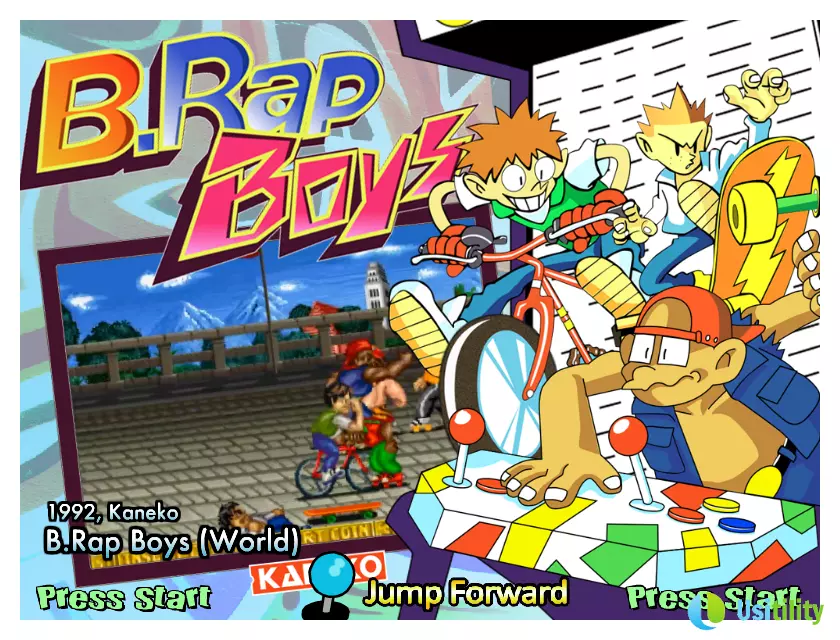
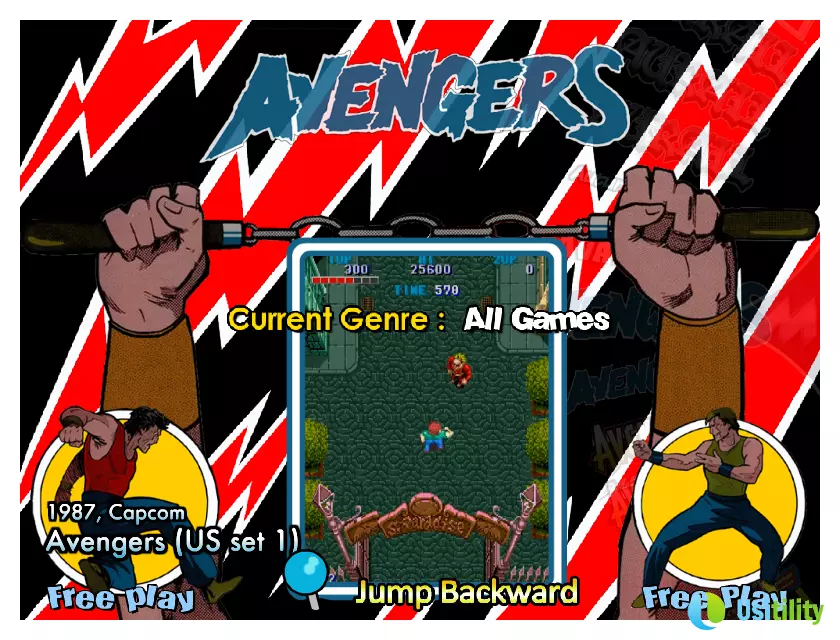
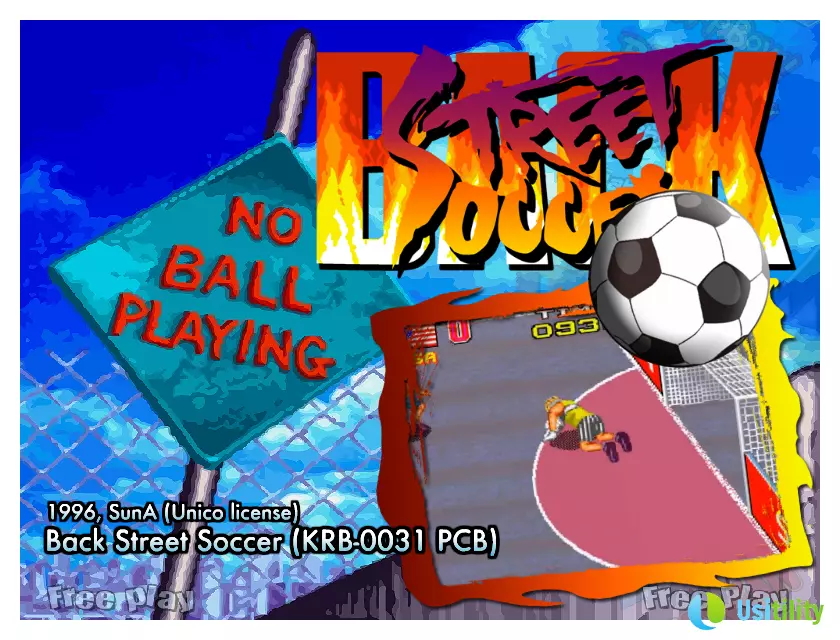
These are some pictures of the final result that our videogame collection will have when we complete the HyperSpin configuration.


To download the images and videos of the ROMs we will make use of the HyperSpin and EmuMovies servers. Access to these servers requires a paid subscription. If we have many systems and ROMs, these subscriptions will be worthwhile, however, if we only have a few ROMs, we can download the files (videos and images) manually without any kind of subscription. In this tutorial we are going to focus on those configurations of multiple systems and ROMs, so we are going to make use of the mentioned subscriptions.
Downloading and installing HyperSpin
The first thing to do is to download the HyperSpin frontend.
The download file is larger than 400Mb, so it may take some time to download. The downloaded file is compressed, so you must have a decompressor like 7-Zip to be able to decompress it.
Note: It is important to decompress the content of the file in the root of the hard disk, so that the content of the file will be located in C:\HyperSpin, or D:\HyperSpin. The important thing is that the directory where we decompress HyperSpin is not a subdirectory, that is to say, the following directory would be incorrect C:\Emulators\HyperSpin.
In this tutorial, we are going to install the program in the path C:\HyperSpin. So throughout the tutorial we will use that path to refer to the installation of HyperSpin.
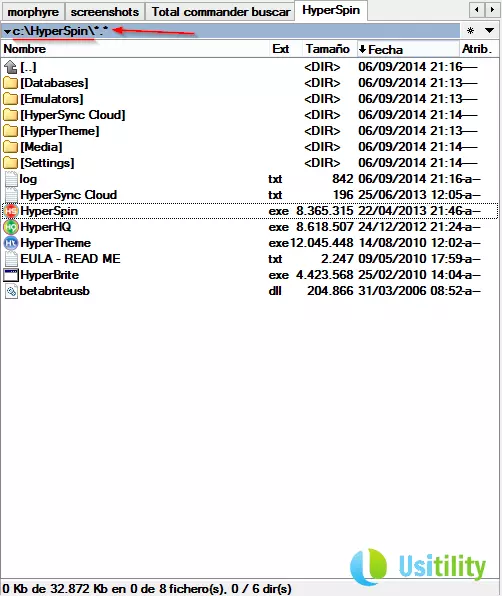
Once decompressed, we can launch the program by double-clicking on the file C:\HyperSpin\HyperSpin.exe. A presentation screen will appear and then we will access the main menu of the program. The main menu consists of a list of systems (video consoles). We can move through the list by pressing the up and down arrows on the keyboard. Every time we are over a system, the background image will be changed and a video showing some of the games of the video console will be shown. By default HyperSpin comes preconfigured with the following Systems/Video Consoles:
M.A.M.E.
N.E.S. (Nintendo Entertainment System)
Super Nintendo
Nintendo 64
Game Boy Advance
PlayStation
Sega Master System
Sega Mega Drive/Genesis
Sega CD
Sega 32X
Dreamcast
Game Gear
Sega Model 2
Neo Geo
Neo Geo Pocket Color
Atari 5200
Lynx
TurboGrafx-16
3DO
Daphne
We must bear in mind that even though we can navigate those systems, it doesn't mean that we can start playing these games. If we access any of the systems/video consoles, we will see that there is a list of games that we can play.
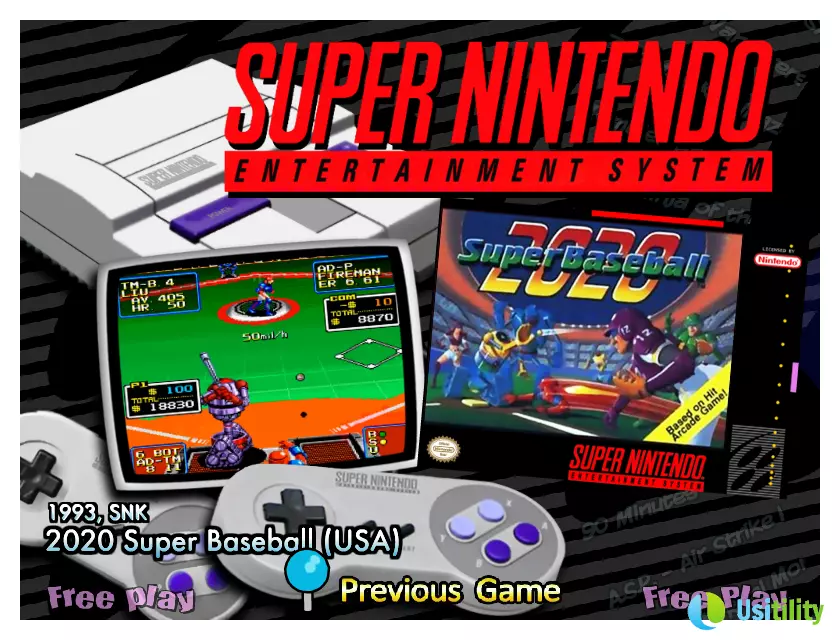
If, for example, we access the Super Nintendo video console, we see that the first game on the list is 2020 Super Baseball, and it appears accompanied by a demonstration video and the videogame's cover.
However, if we place ourselves in any other game on the list, we will see that no video is shown and no game cover is displayed.
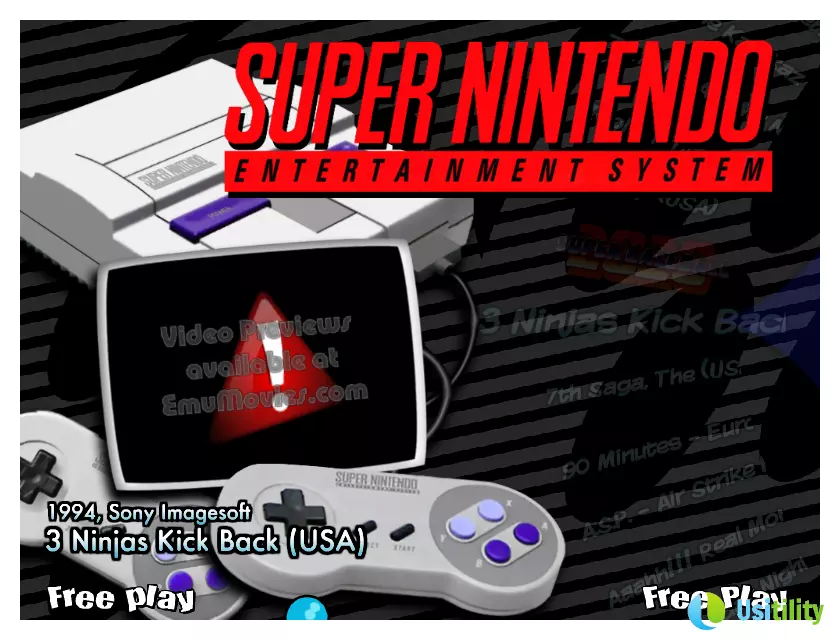
This is because including all the covers and videos in the download file would make this file take up many Gigabytes, which is not convenient for users who download the file.
Our goal in this tutorial is to make all games on all systems/video consoles show the cover art and video so that when we browse the game list, we can preview the video and see the game cover art.
After having executed HyperSpin and to have seen it running, we can extract several conclusions of its operation. It is important to have the following points clear to understand how HyperSpin works:
The systems/video consoles listed in HyperSpin are independent of the emulators we have installed on our PC. That is, we can add systems to HyperSpin and not have the emulator of that system. So in the main menu, the added system will appear but we will not be able to play any of the games of the system.
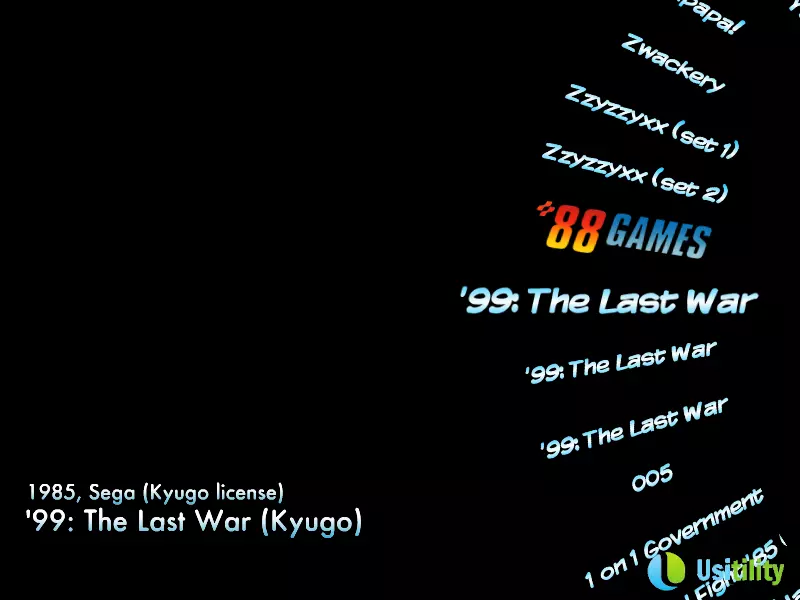
The list of games that appears in the Systems/Video consoles is independent of the ROMs that we have stored in the PC. As we have seen, when we go into any of the systems, we see a list of games. This list of games is defined by one of the files of HyperSpin and it usually contains almost all the games of the catalog of that system/console. In another tutorial, we will see how to associate this list with the games ROMs.
The covers and videos of the games are not included in the installation package and we must download them separately.
Downloading and configuring multimedia files (images and videos)
Now we are going to see how to download the multimedia files of the systems and video games automatically. This process will download the multimedia files of those systems/video consoles that are configured in HyperSpin.
For this step we need two payment accounts:
- HyperSpin: for the covers and wallpapers. You must register as a user and go to the next page: http://www.hyperspin-fe.com/forum/payments.php Here they explain the different types of payment plans needed to access the FTP with the images of the games and systems.
- Emumovies: for the videos of the systems and video games. You must register as a user and go to the page http://emumovies.com/forums/index.php?/store On this page you will see the details of the subscriptions available to access the FTP with the videos of the systems and games.
Note: If you create a Platinum account at HyperSpin and a Lifetime account (LIFETIME) at Emumovies, you can use a 25% discount coupon on the Emumovies account. The details of the coupon are in this forum: http://www.hyperspin-fe.com/forum/showthread.php?25316-Emumovies-code
As we mentioned above, you can download the videos and images manually and for free, but in our case, we are configuring many emulators with the game collections (ROMset) almost complete. This can add up to more than 20000 games, which makes downloading manually the multimedia files of each game an arduous and heavy task.
To carry out this task there is a software called HyperSyncCloud, which allows us to use the accounts of HyperSpin and Emumovies and to download automatically the graphic and video files of both accounts.
The first thing we must do is download HyperSync Cloud and decompress the contents of the .zip file anywhere on our PC. Run the HyperSync Cloud.exe file. Now we follow the next steps to configure the program:
Click on the icon of the white doll on a blue background.
Enter the forum username and password HyperSpin and press login.
Enter the username and password of Emumovies and press login.
In the main screen click on "folders". Here we configure the location of the directory where HyperSpin is installed and the directory where the multimedia files are stored. If we have installed HyperSpin in C:\HyperSpin, it will not be necessary to modify the configuration option of "alternate videos folder" is used to indicate if the videos should be downloaded in a different location from the graphic files. This is useful if you want to store all the videos on a different hard drive than the one used by HyperSpin. If we activate this option, we must configure the alternative directories (one per system) in HyperSpin (using HyperHQ.exe or editing the .ini files of each system).
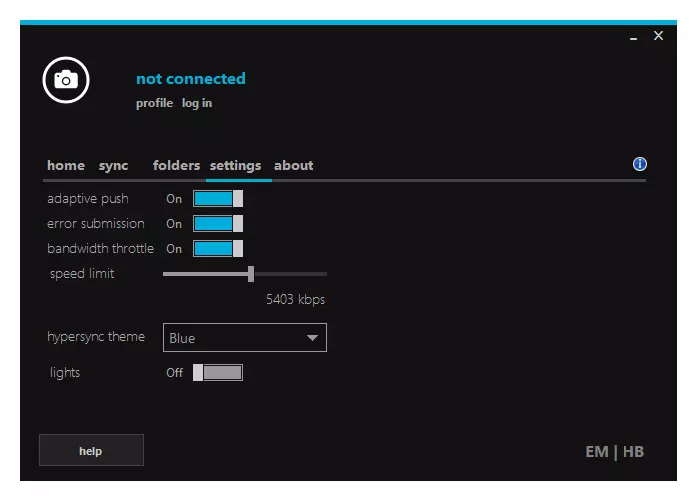
In the main screen, we click on "settings". We make sure that the option of "bandwidth throttle" is activated. We are going to limit the speed at which the multimedia files are going to be downloaded, this way we will be able to use the Internet without the download of these files interfering too much in the bandwidth. For example, if we have a 1 Mbit/sec connection, we can move the "speed limit" bar to 600 kbps, this way we will have 400 kbps to browse or read the mail. Depending on the connection we have, we will have to set one limit or another

We have already done the basic configuration of HyperSync Cloud. Now we are going to "link" the systems so that we can download automatically the multimedia files:
On the main screen, we click on "home" and press the icon of the arcade machine. A new screen called "media configuration" opens.
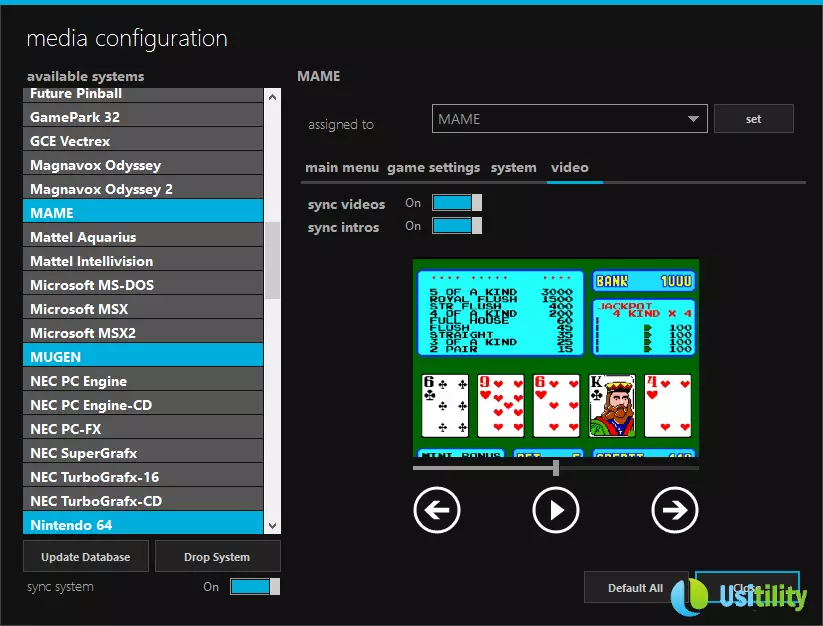
In the list on the left, we choose the system we want to synchronize. In our case, we are going to choose MAME. It will ask us if we want to configure MAME, we click on Yes).
In the lower part of the screen, we click on "Default All". This loads the default configuration to download the multimedia files.
In "game settings" we mark all the options to "On" (box art, cart art, wheel art, themes).
In "video" we make sure that "sync videos" and "sync intros" are marked "On"!
In the lower-left, the option of "sync system" must be set to "On".
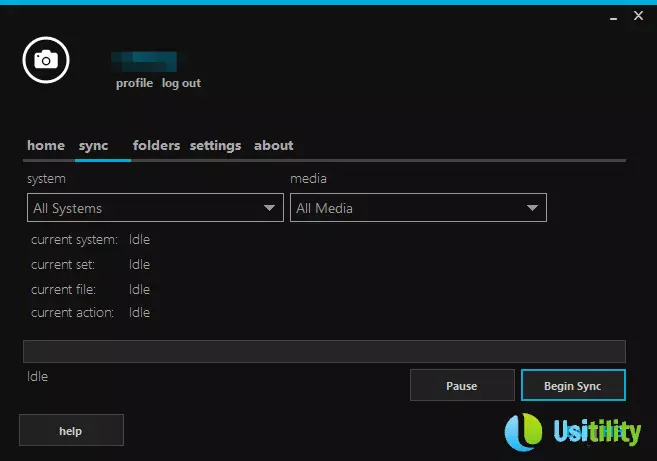
In the main screen, we click on "sync". We make sure that in the dropdown of "systems" is selected "All Systems", and in the dropdown of "media" is selected "All Media"
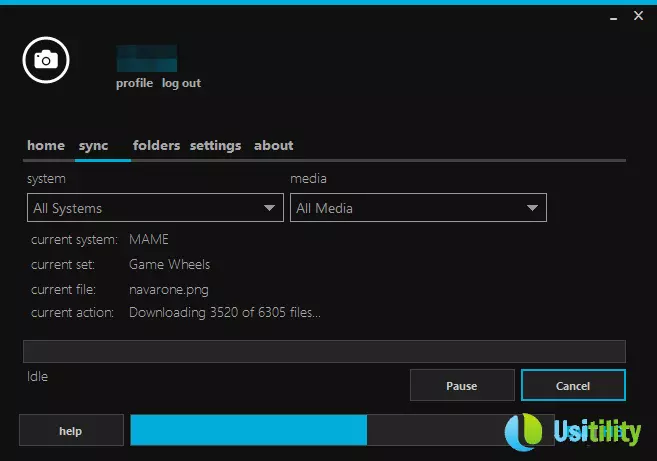
Press the "Begin Sync" button and watch how the file download progresses. The games, images, and videos will be downloaded. As we have commented previously this process can take quite a long time
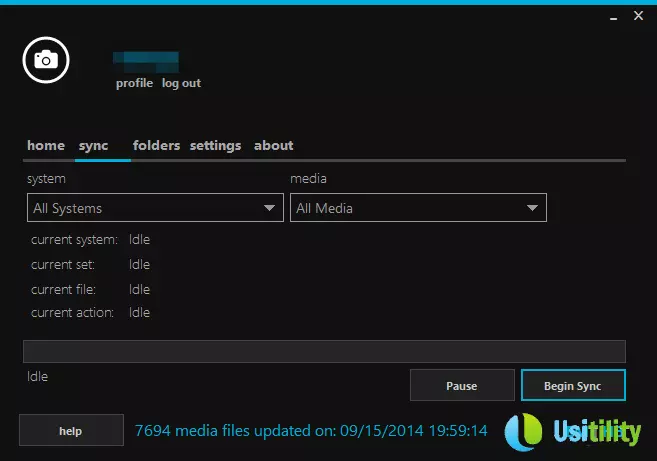
When the process finishes we will see a summary of the files that have been downloaded in total. In our case, there have been a total of 7694 files downloaded.
Note: We have only configured the MAME system, if you want to configure another system, just repeat the previous steps by selecting the new system we want to synchronize. Note 2: If we use the official Database of HyperSpin for MAME (c:\HyperSpin\Databases\MAME\MAME.xml), HyperSync Cloud will not be able to download the videos. In this image you can see how when you access to HyperSpin, the game videos of MAME are not seen. If we analyze the file debug.txt we will see the following error: Error: backgroundWorkerRunSync_DoWork() Details: System.NullReferenceException: Reference to object not established as an instance of an object. If we want to avoid this error, we must download the following file MAME_list.zip and decompress its content in c:\HyperSpin\Databases\MAME\. We must overwrite the file MAME.xml. Once this is done we go to HyperSync Cloud and click on "sync". We choose "system->MAME" and "media->Game Videos". Click on "Begin Sync" and the video download will start!
Now all that's left to do is to launch HyperSpin and see how MAME's game list looks like. When we access we can see that the style of the games' fonts has changed, plus some of the games show special backgrounds (Themes), and a video of the selected game is previewed too 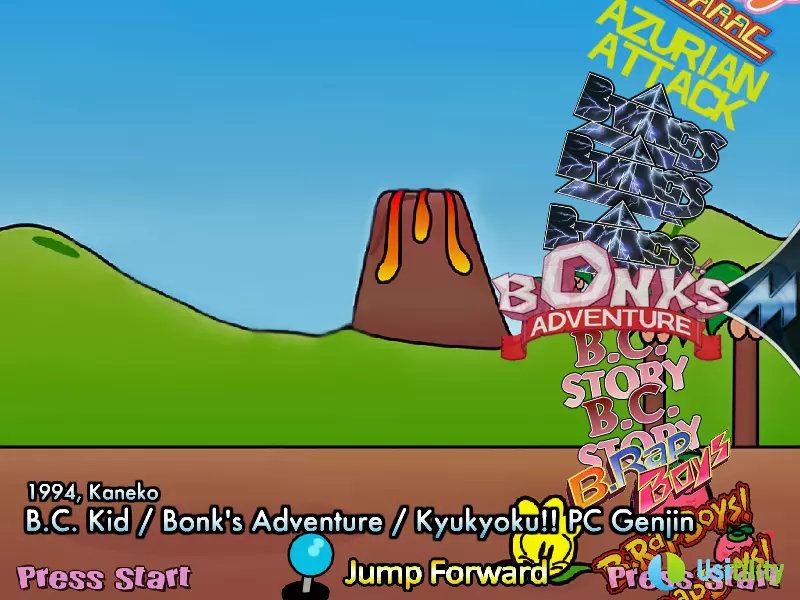
As we have seen the configuration is a bit complex, but the final result is worth it. Here are some pictures that illustrate the final result of the configuration.
Note: What we've done in this tutorial is "turn beautiful" HyperSpin. The configuration of the emulator and the ROMs should be done separately. So we have to configure correctly the MAME emulator and the ROMs. It is as simple as launching HyperHQ.exe and filling in the corresponding data. In the image below you have an example of how to configure it. If you want more details on how to add a new system to HyperSpin you can visit the tutorial of how to configure in hyperspin the PS2 emulator (PCSX2).